Yesterday was a BIG canning day. I had nine trays of tomatoes lined up on my dining room table in the peak of ripeness. This was not going to be easy to finish in one night, but I was determined to make the most of those red beauties. There were even a several more that were ready to pick when I got home from work. The job was getting bigger, not smaller.
The first thing I had to do was make a phone call to my oldest daughter. Michelle willing volunteered to come right over from work. I get home well ahead of her, so this gave me time to set everything up to work. I cored and halved all the Celebrity (round) tomatoes and started cooking those for juice. I got a large kettle of water going for blanching, while I washed all the Roma tomatoes for canning whole. Rather than using the sink for cooling, I brought in my enamel tub and set it up with cold water on the kitchen island. This was Michelle's work zone. She was in charge of coring and peeling all the Romas. All she needed was a paring knife, compost pail, and a Summer Shandy.
I was able to quickly cook and juice the Celebrity tomatoes. I have wonderful kettles that do waterless cooking. A few minutes of blending with an immersion blender and the juice was easily strained and in the roaster to stay hot. I used my electric fry pan to heat my lids to be sterilized. I pulled out both my pressure canner and water bath canner. I used the water bath to sterilize the jars first and get them hot. I lost a couple bottoms from jars this year, which I think was due to not being hot enough going into the canner. It could also have been the age of the jars. The water bath canner was also going to be used for juice once I got far enough into the process. As Michelle got the tomatoes peeled I added them to the juice in the roaster to heat up for hot pack canning. It takes 15 minutes of processing time versus 45 minutes for cold pack. I like the results I get with hot pack as the sealing goes much more smoothly with very little liquid being forced from the jar during processing. Using tomato juice rather than water for packing the whole tomatoes was a stroke of genius I had while driving on my job.
The tomatoes heated very well in the juice, and the process was hot from start to finish. I would scoop the whole tomatoes out with a slotted spoon to pack the jars. Then, I would add the juice to finish them off to within an inch of the top. A quick wipe of the jar rim, a hot lid, screw band, and into the canner. The pressure canner took 15 minutes at 5 pounds of pressure, the water bath 15 minutes from coming to a boil. Same timing for the juice only jars at the end.
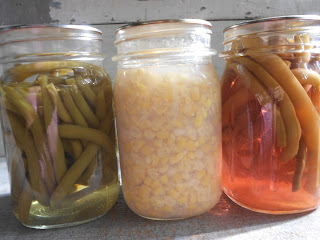
Four hours later, I had over 14 quarts of tomatoes and over 8 quarts of juice. EVERY JAR SEALED!!! This is canning perfection not always attained. I always let the jars sit overnight before removing the bands, wiping the jars, and adding labeling with contents and date. I opted to not add any salt or seasoning. This will allow me the flexibility to use them in a variety of ways.
The shelves are getting steadily fuller and the jar supply is dwindling. I might actually have to buy jars to finish out the season.
Michelle went home after sitting and listening to the canner hiss for awhile. I sent her off with a few jars that we are using up from last year's canning (not too much left). It has been a very gratifying season to have so much ready for winter. The added benefit of canning is that I don't have to worry if some chemical is going to leach into our food from the can liner. Glass is BPA free naturally.


