Showing posts with label canning. Show all posts

Monday, October 26, 2020

Canning with ease with a few good tools


I haven't posted in years. My work life has been all-consuming with managing a greenhouse and nursery. I still garden and all those things associated with it. Blogging just hasn't been on the list of things to do. Grandchildren came along and there went the rest of the time I used to use for tracking my gardening activities.

 The corona virus has given me some extra time for a couple weeks. I have been on a close contact quarantine which keeps me out of work. Windows have been washed, the garden cleaned out for winter, vegetables dug, and all those piles of mail have been sorted and filed. Now I have some time to share a little bit of canning tricks I have come up with in the past couple years.

I bought the stainless steel pans so I could cook down maple syrup. They have come in handy for other jobs including canning. I am able to blanch a large quantity of vegetables in one batch. I can steam my jars before filling them. I can process items into them and reheat for canning. They are really versatile.  

The other thing I use a lot is a Camp Chef 2-burner stove that Cabela's sells. I have seen them on Amazon as well. I can do two large kettles at one time with twice the jars...and do it outside to keep the heat out of the kitchen. 

I also have a small fondue pot with a temperature dial that works very well for sterilizing lids and not occupying a burner on the stove. I can plug it in right by my jar filling area and pop them on with a small magnetic tool that lifts them out of the hot water with no fishing around to get them. I also found a jar filling funnel with the headspace marks on the outside so no more guessing. I found a good Foley food mill at a resale store and added that to the mix.

One tool that I find indispensable in my kitchen is an immersion blender. No more pouring hot liquids into a blender or processor. I do it right in the pot that I am cooking in. I don't peel tomatoes for juice or sauce. Just core and cut cut the big ones for cooking. I blend them and then put them through the Foley mill to remove the seeds. Sauces are so much thicker without all the cooking down. Check those out in the kitchen section of the store or on line. You will love it for cream soups as well.
 

Monday, October 14, 2013

What's in your canning kettle?

I have been enjoying a little bit of domestic time now that the wedding is done and the flowers are no longer on the top of my list.  I will post pictures, but I promised my daughter that she gets first dibs on posting wedding pics.  She wants to share them with the florist first, who was absolutely terrific in working with us.

I thawed out the eight gallon bags I stowed in the freezer and made my spaghetti sauce this weekend.  When you start from frozen, it takes a bit more time.   Little by little I got them in the electric roaster and cooked them down.  A bit of this and a bit of that and 24 hours later, I had 10 quarts and seven pints of spaghetti sauce and an additional four pints of chili sauce.  I made a modification to the spaghetti sauce and added two tablespoons (minimum) of red wine vinegar to each quart of sauce to raise the acidity.  I water bath canned them instead of pressure canning with the increased acidity.  I have no meat in my sauce when I can it.  All should be good according to my research on the adaptation.  The chili sauce was in the Ball Book.  The smell of this cooking was delicious with all the spices and vinegar cooking down for several hours.

I also had a few pounds of pears from the neighbor.  We ate several fresh, but they start to over-ripen quickly so they are now pear chutney which I made from The Pickled Pantry.   This recipe also smelled so good as it was bubbling on my stove top.

I have windfall apples from my sister chilling in the frig for a new batch of applesauce.  Don't you just love autumn?!

Friday, August 23, 2013

Lots more watering without the rain

We finally got some rain yesterday, it came down in buckets so there was a lot of run-off rather than a good soaking.  I will not complain about it, though, as we had gone a long time without any rain.  The rain barrels are filled up again.  I wish I had a larger storage system so I could use even more.  A cistern with a pump would be sweet.

I can see that the pak choy that I planted just days ago has already germinated.  We had some heat this past week with more on the way next week.  We have a nice cool weekend with mild temperatures in store.  

I am hoping to have enough tomatoes to start canning over the long Labor Day weekend coming up.  I think I am going to have to stick with sauces and salsa as I still have tomatoes from last year in jars.  It was so nice to be able to grab a jar of spaghetti sauce already made for a quick meal.  Homemade is always better.  I ran across a recipe from my grandmother's files for homemade chili sauce.  I also have a ketchup recipe shared by one of my cousins.  So many ways to use tomatoes.

We are celebrating the upcoming wedding with a shower for my daughter this weekend.  I am going to use whatever blooms are ready in the garden to decorate the tables and to share afterwards.  Flowers that are given away are the prettiest in the garden.  I will have to take pictures and share later.

Beans have been rather slow this year.  I think the cooler temps overall have really affected their output.  I hope this run helps put some more on the plants.

Wednesday, October 10, 2012

Canning Season Part 3 or ...

My coworkers are starting to talk about what I will stick in jars next.  Yes, it has become almost an obsession.  There are just so many recipes out there and so much good produce that it seems a shame to not try it all.  The cooler weather has also made heating up large kettles of water an appealing way to add heat to the house while accomplishing another task.  So many vegetables, so little time...
I pulled my two foot square patch of beets out of the garden and cooked them up the other night.  I popped them in the frig to cool overnight so I could peel and cut them for pickled beets.  I had enough for three half pint jars.  I got everything hot, and sterile except I didn't heat those beets enough.  A couple minutes after dropping the jars, I heard the ping. A lift of the canner's lid revealed bits of orange zest floating in the water.  What a disappointing waste.  It did reinforce past lessons that all hot ingredients are better for canning.  I do get around this somewhat with pressure canning by starting out with just warm water and heating it all together once the jars are in.  I am not a fan of cold pack methods because of liquids being forced from the jars and broken jars.
I found a bag of mangoes in the freezer and thought this would make a good relish.  The newest Ball Canning book has some great recipes for tropical fruits and mango relish was one of them.  I was not about to run out and buy papaya or white grape juice so I improvised with some pineapple I had frozen earlier this summer, juice from the orange I used the zest in the beets, and various peppers from the garden (fresh and dehydrated).  I added a couple of spices that complimented the fruits and heated it all through.  It thickened up nicely and has just a bit of heat from some of the hotter peppers.  I was able to get six jars for the winter pantry.  It will be a nice quick addition to a supper of chicken or pork, possibly even fish.  
The canning experiments also have me thinking about our state fair.  Maybe this is the year I finally get off my duff and enter something in the fair.  One of my favorite parts of the fair is looking at the entries that have one in culinary and creative arts.  It might be fun to have another reason to browse the cases.

Sunday, October 7, 2012

Canning and Cuttings

With a conference to attend and family in town, I have had no time at home.  Today was catch up time.  I spent a pretty penny on the precious apples and was not about to abandon my plans of spiced apples and green tomato mincemeat.  
The mincemeat was a little putzy, but I think it was worth it in the end.  I even pulled out the old meat grinder to grind up eight cups of green tomatoes.  I have still been trying recipes from The Pickled Pantry by Andrea Chesman.  Both of these were in her book.  Most of the pickling recipes need about six weeks of shelf time to fully develop their flavors.  The mincemeat is ready to go any time and can even be frozen if that is more convenient for the cook.  It was supposed to make six pints but I had at least two more in the kettle when the canner was full.  I did one pint in two half pint jars for smaller uses, and I ran out of pint jars.  I took some extra to the neighbor who passes produce my way and put a bit in the frig to try a bit in some crust when I make pasties for supper tomorrow.
The other job on the top of my list this past week was making sure I get my cuttings in the house before the plants freeze.  My coleus are done after last night's cold, but there was good cuttings at the neighbor's house who I share a cup of weekend coffee with. We met when I used to walk the dog.  Both of us garden, but he changes up what he is growing.  It is this neighbor I have to thank for my light table as he lost interest in using them himself.  He consistently keeps roses in the mix.  The conversation is never lacking for interest.
It may be time to see about cabbage for sauerkraut on my next market trip.  I look forward to trying another new skill.

Tuesday, October 2, 2012

Fall Farm Market and canning season

The time is right for getting out to the Farmer's Market.  We are nearing frost time so pretty soon all the summer stuff will be gone and the cole crops will be in their prime.
It is also time to get out and get your apples.  In our neck of the woods an early spring followed by a freeze knocked out much of the apple crop so pickings are slim and the deals will not be found this year.  I am thankful that putting up applesauce is not on my list this year.  I will make do with what I have on the shelf from last year until it runs out.  I did get some Granny Smith's apples to make some spiced apple pickles and also am looking at a green tomato mincemeat to put up with the last of the crop I stripped off the plants this weekend.
I recommend a great book that I have been referencing and doing some canning with.  Our library had a copy of The Pickled Pantry by Andrea Chesman in the new volumes.  I have done pickled spice plums, pickled cauliflower, pickled tomatillas, and dilly bean so far. I want to try sauerkraut and the apple recipes I mentioned already.  I am putting this book on my Christmas wish list this year.  Try something new this year.

Wednesday, September 12, 2012

Canning Season Part 2


 Yesterday was a BIG canning day.  I had nine trays of tomatoes lined up on my dining room table in the peak of ripeness.  This was not going to be easy to finish in one night, but I was determined to make the most of those red beauties.  There were even a several more that were ready to pick when I got home from work.  The job was getting bigger, not smaller.
The first thing I had to do was make a phone call to my oldest daughter.  Michelle willing volunteered to come right over from work.  I get home well ahead of her, so this gave me time to set everything up to work.  I cored and halved all the Celebrity (round) tomatoes and started cooking those for juice.  I got a large kettle of water going for blanching, while I washed all the Roma tomatoes for canning whole.  Rather than using the sink for cooling, I brought in my enamel tub and set it up with cold water on the kitchen island.  This was Michelle's work zone.  She was in charge of coring and peeling all the Romas.  All she needed was a paring knife, compost pail, and a Summer Shandy.


I was able to quickly cook and juice the Celebrity tomatoes.  I have wonderful kettles that do waterless cooking.  A few minutes of blending with an immersion blender and the juice was easily strained and in the roaster to stay hot.  I used my electric fry pan to heat my lids to be sterilized.  I pulled out both my pressure canner and water bath canner.  I used the water bath to sterilize the jars first and get them hot.  I lost a couple bottoms from jars this year, which I think was due to not being hot enough going into the canner.  It could also have been the age of the jars.  The water bath canner was also going to be used for juice once I got far enough into the process.  As Michelle got the tomatoes peeled I added them to the juice in the roaster to heat up for hot pack canning.  It takes 15 minutes of processing time versus 45 minutes for cold pack.  I like the results I get with hot pack as the sealing goes much more smoothly with very little liquid being forced from the jar during processing.  Using tomato juice rather than water for packing the whole tomatoes was a stroke of genius I had while driving on my job.
The tomatoes heated very well in the juice, and the process was hot from start to finish.  I would scoop the whole tomatoes out with a slotted spoon to pack the jars.  Then, I would add the juice to finish them off to within an inch of the top.  A quick wipe of the jar rim, a hot lid, screw band, and into the canner.  The pressure canner took 15 minutes at 5 pounds of pressure, the water bath 15 minutes from coming to a boil. Same timing for the juice only jars at the end.
Four hours later, I had over 14 quarts of tomatoes and over 8 quarts of juice.  EVERY JAR SEALED!!!  This is canning perfection not always attained.  I always let the jars sit overnight before removing the bands, wiping the jars, and adding labeling with contents and date.  I opted to not add any salt or seasoning.  This will allow me the flexibility to use them in a variety of ways.
The shelves are getting steadily fuller and the jar supply is dwindling.  I might actually have to buy jars to finish out the season.  
Michelle went home after sitting and listening to the canner hiss for awhile.  I sent her off with a few jars that we are using up from last year's canning (not too much left).  It has been a very gratifying season to have so much ready for winter.  The added benefit of canning is that I don't have to worry if some chemical is going to leach into our food from the can liner.  Glass is BPA free naturally.

My tomato garden is 4'x17', there are 8 Celebrity plants (back), 9 Romas (front), and 1 Sungold (the tall one by the mailbox). I also have cukes growing up the wall in the back.  The Celebrity plants are in tradtional cages.  The Romas are in a weave support system that was described in Organic Gardening Magazine this spring.  I water only from the bottom with soaker hoses, compost is the only fertilizer I use, brown paper and cocoa bean hulls are the mulch.

Friday, September 7, 2012

Canning Season

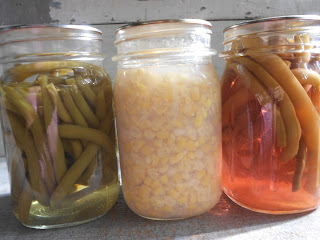
green beans, corn, dilly beans


French beans


salsa


salsa verde
I have been putting up more of my garden in jars this year as we are getting beef from a local farmer this fall.  I need the freezer space for the meat, but I also like the convenience of grabbing a jar of veggies and heating them on the stove. 

This year I am trying some new things.  I have never made dilly beans.  I shared the recipe on a earlier piece.  I am also making salsa verde this year as I planted four tomatillo plants.  Husk tomatoes make a great sauce for a different twist.  Here is the recipe I meshed together to make a salsa verde which I was able to can.

Roasted Salsa Verde

2 quarts of tomatillos husked, washed, and cut in half
4 cloves of garlic
3 medium to large onions peeled and quartered
4 jalapeno peppers split and seeded
olive oil to coat vegetables lightly

Using a grilling basket or foil over grill rack, roast the prepared vegetables that have been tossed with olive oil until softened (about 10 minutes on a hot grill).

1 cup chopped cilantro
4 lemons, juiced 
4 limes, juiced 
1 t cumin
salt to taste
black pepper to taste

Add the above ingredients to the roasted vegetables in a food processor to puree or put all directly into a large kettle and blend until smooth with an immersion blender.  Cook the salsa verde until hot and slightly thickened (I let it simmer about 20 minutes or so).

Follow canning directions for hot water bath or pressure cooker.  There is more to read than I feel like typing for safe canning methods. Have jars sterile and hot and lids sterile and hot.  Fill jars with 1/2" of head space.  Hot water bath pints and half pints for 20 minutes.  If you prefer to pressure can them use 5 pounds of pressure for 20 minutes.

This made 7 half pint (jelly size) jars in my first round.  Also tastes pretty good straight from the kettle.

I use my pressure canner a little more lately as it takes the uncertainty out of the acidity equation for water bath canning.  It also takes less water.  Allowing the canner to cool naturally before opening does take more time.  If you move it to a cooling rack on the counter from the stove, it does shorten that time a bit.


tomatillo plant


Sunday, August 26, 2012

Canning French Beans

Today was my day to get my beans Frenched and in the jars.  I had picked and washed the beans and tossed them in the frig yesterday as I did not have the energy to get the canning done.  I did snip the ends off the beans while supper was cooking, so I had part of the job done for today.  I start any canning process by gathering everything that I will need to do the job from start to finish.  I have my jar lifter, funnel, and wooden spoon that I keep together once canning season starts.  I also use canning salt, sealing lids with bands, and glass jars that I bring up from the basement when needed.  If I am canning vegetables, I use my pressure canner.  Fruits can be processed in a hot water bath.  I want to learn more about steam canning as an alternative to the hot water bath.
Jars need to be checked for nicks and cracks.  I run my finger around the top of each jar to make sure it has a smooth edge for sealing.  Sometimes they chip or get a stick residue from the sealing compound. Chipped jars will not seal.  Sticky jars have to have the goo removed with alcohol or other cleaner that will take it off.  Once they are washed in soapy water, they go into a hot rinse water where they stay until the food goes into the jars right before sealing the jars.
Always use new lids.  Some jars use canning rings or other compounds.  I choose the one use Kerr lids that I just use for dry storage once the seal has been used and broken.  Follow the directions on the box for sterilizing and keeping the lids hot before using.
I have a hand crank French beaner. The beans are fed into the top as you turn the crank.  A white nylon wheel moves the beans through the cutting disks turning each bean into a thin lengthwise slice.  I started out using a smaller hand held tool which the beans were pushed through and pulled out the other side one by one.  I eventually splurged on this with a 50% off coupon in the gardening catalog.  We like French beans, so this was worth the money I spent ($20 sounds about right).
I steam blanch the beans for 5 minutes before putting them in the jars.  Loosely pack the beans with 1" of head space.  Add a half teaspoon of salt.  Top off with boiling water to cover beans with the 1" head space.  Wipe down the top of the jar before placing a hot lid on top.  Use a screw band to hold the lid in place during canning.
Place the jars into the pressure canner with 2-3" of hot water.  My pressure canner can hold 10 pint jars which helps speed the process up.  Some canners are tall and can handle a double layer of jars.  I can only do that with half-pint jars.
Fix the lid on the pressure canner and place over heat.  Once the steam starts coming out the top.  I place my weighted pressure gauge in place.  Other canners will have a knob to close off and you set the gauge to the proper pounds.  Beans are canned at 10 pounds of pressure which raise the temperature at which water boils from 212 degrees to 240 degrees.  Vegetables are low acid and need the higher temperature to sufficiently stop bacterial action safely.  
Once the beans have been held at this temperature for 20 minutes for my pint jars, I remove the canner from the heat and let it cool down naturally.  I do not remove the weighted pressure gauge or run cold water over the outside of the canner to cool it faster.  This is just part of doing it right.  Once the temperature is down enough that the pressure in the canner has come down naturally, I can remove the weight and open the lid.  Always remove lids away from your face and hands to avoid steam burns.
Use a jar lifter to take the hot jars out of the canner.  Place them on a heat proof surface to cool completely.  Do not turn the bands or shake the jars, just let them set.  If some jars have not sealed, (read your lid box on how to tell what a sealed lid looks like) place those jars in the refrigerator or use right away.  I will let jars sit over night before removing the screw bands and cleaning the residue off the jars.  Make sure to label the jars with contents and date.  The year is usually enough unless you really like to keep track of canned goods.  Different sources will tell you how long you should keep canned goods but most things keep quiet well for at least a year or more.  Place jars in a cool, dark location to best preserve the color and quality of canned goods.  Don't let the jars freeze.  
This is just a general tutorial for canning.  I do recommend getting a book on canning to really understand the process and learn about how to do other types of foods and canning.  There is nothing quite so satisfying as going to your pantry in the dead of winter and enjoying last summer's harvest. 

Tuesday, August 21, 2012

First basket of tomatoes

I happily went to the tomato bed and FINALLY picked a full basket of tomatoes.  Yes, they aren't all rosy red ripe, but they also do not have chipmunk or squirrel teeth marks in them.  I was able to get some fresh cilantro from the West Allis Farm Market, so fresh salsa will become a reality.  The jalapenos are also starting to produce peppers of harvest size.  The long wait has come to an end.
I got the tomato plants in late this year to allow for room in the driveway with our graduation party taking place during normal planting time.  With all the heat we had, I was sure the tomatoes would be earlier any way. Not so.  The nights have cooled off quite a bit and have slowed progress.  I still have to get my first celebrity tomato this year.  My farmer friend from college was in town for Irish Fest this weekend.  She told me her sister-in-law lost their garden to a storm when one of the nearby trees landed on the garden in June.  It is still there among  the weeds.  I guess I should count my blessings that it is just a wait and not a total loss.
Even the cherry tomatoes have been slow to start.  Today was the first picking that I didn't put directly into my mouth. There are more to come.

I am planning on putting more into canning jars than the freezer this fall to save on freezer space.  We have half of a steer coming in October which will take up all we have.  Another freezer is in the near future, hopefully and upright to save on the digging and lost items in the bottom of the chest.  I have done dilly beans and cut beans which put several jars on the shelf.  I also have sweet corn canned this year (a first for me) which put nine pint jars in store.  There would have been 10, but one went "ping" and spilled into the pressure cooker water.  I was not happy to start everything over to get the corn out of the water.  More beans are ready for picking, so I think french beans are next.  Fall is an exciting time of year for a gardener.


Friday, August 10, 2012

A Whole Day of Rain

We got 1.5" of rain in the rain gauge during the last 24 hour period!  It was a nice slow rain that took to the dry ground.  It is (amazingly) still dry out there even with all that moisture.  I loved being woke up by a rain storm outside the window.

We had cloudy skies this morning which brought the sunshine in by mid-morning.  With it came wind.  I stopped at the lake front during lunch and watch the waves crash over the breakwater at South Shore Marina.  The air show is this weekend, so we had a little overhead entertainment as well.  There were a handful of people who chose this little spot to enjoy some water watching as well as enjoy the company of strangers.

I bagged up my onions tonight and hung them in the basement.  I weighed them and found that I have 30 pounds of onions! I thought I was being optimistic saving so many mesh bags, but I filled three large orange bags quite easily.  I will be able to share my bounty this year.  I sliced up one with eggplant and zucchini and fried the whole slices dipped in egg and flour on the griddle with butter.  The results were like having a lower fat, less batter onion disc.

Tomorrow, I will have to pick green beans and soy.  I had a handful of soy which I cooked up and put in a tomato salad for lunch.  Edamame is a nice addition to salads or just eating with a bit of salt.  (August 3, 2011) http://gardeninggwen.blogspot.com/2011/08/soybeans-aka-edamame.html I grew half of my soy beans from new seed and half from seed that I ripened on the plants and harvested dry last fall.  Both plots germinated and grew equally well, so I think that seed saving was successful with this crop.

My neighbor has shared his early tomatoes with me as well as enough to share with the other neighbors.  His garden is quite large even after shortening it 20' or so this past year.  He grew a row of beans the full length of the garden which is well over 40' long.  They have already canned and frozen all they will use.  I passed the word on to others and offered the suggestion to donate to Harvest for the Hungry as they were opting to rip out the plants to stop the harvest.  Several soup kitchens and food pantries are also nearby, so I think they have abandoned the thoughts of pulling the plants.  They also have several cherry type tomato plants which are producing heavily.  I took a bag to work and put them on the basket on the corner of my desk.  My coworkers did a good job of eating them all.

I am thankful for some cool weather as it is time to can some French beans this weekend.  I will eagerly share the results of that job.

Sunday, May 13, 2012

Mother's Day Tribute to my Mother (and Happy Birthday, Mom)

Door County cherry pick, Mom and Gwen
Mom knew how to eat local.  This is from a Door County cherry picking trip.  It wasn't exactly local eating from where we had to drive to pick the cherries, but it was a day trip which meant lots of pitting and canning the following day.  Going out to pick berries from the surrounding area was local and it happened every year, in each season of ripeness.  There was also the gardens that we grew as well as trips to the "muck farm" for massive amount of fresh produce for home preservation.  Canning is a skill I learned through observation and repetition.  
Mom with her camp cookware
Cooking outdoors was also a skill I learned from my mom.  In my 6th grade year she gave my dad an ultimatum.  Less time in the bar, more time with her.  They bought a camper.  Mom was quite an outdoors cook.  I think it stemmed from growing up with wood stoves on the farm.
Mom and Dad at Boulder Lake September or October 1970's
Those camping trips with my parents were special times.  Half of my sisters were grown and out of the house by the time the camper came into being, but that didn't stop them from becoming family trips.  These photos are from sister #3 and the car in the background belonged to sister #2 and her husband.  (I am #6 in a line of seven girls.)  We would take week long trips in the summer.  Sometimes it was a long weekend trip to go hunting or fishing.  It was always good to get away from the TV and spend some time talking around a campfire.
Mother's Day camping trip late 1970's
Mother's Day weekend became our first official camping weekend of the season.  Our most memorable trip was to northern Wisconsin (more north than we already lived).  The temperatures were in the high 70's when we left on Friday.  They never were that warm again the rest of the weekend.  The kids wore socks on their hands to warm up as we didn't bring winter gloves.  We also warmed rocks by the fire to warm our hands.  There's a whole story there which ends up with stitches in the emergency room...another time for that one.
Picnic 1970's Mom and Dad
We went on picnics frequently as a family.  We didn't stop and eat in restaurants.  The large number of people in our family made that cost prohibitive.  We would pack a lunch and eat it in some nice spots somewhere along our route.  Dad and Mom liked to take Sunday drives through the woods that surrounded our area in the Nicolet National Forest.  Dad never owned a 4-wheel drive vehicle in his life, but that didn't stop him from taking us boldly where only logging trucks have gone before.  Dad gave us an adventure every time.
Lunch during tree planting 1970's
We also learned a work ethic from our parents.  No one was too young to contribute in some way.  In order to earn tuition money for my older sisters to go to a different district's high school (this was also a lesson in political activism), we went in groups to plant trees for the Forest Service.  Grown ups would make the hole with the planting bar while we little ones put the trees in for them.  Looking back, it was the little ones that carried the bag of trees and did all the bending.  I'm sure some would consider that child abuse, but we lived through it with mostly fond memories.
Mom in front of the old Red Owl store
Even after dad passed at an early age, Mom continued to teach us how to make it in this world.  She went back to work to earn some extra money beyond Dad's pension.  She also passed on her great sense of humor to all of us.  Dad was the prankster in the family, Mom had a finely tuned wit.  Laughter is a gift that should never be over looked when considering the legacy you leave your children.  We have a rich legacy from our parents in that department.
Gwen and Mom 1960's
I also learned early on how to enjoy a cold beer after a hard day.  Before any one out there gets the wrong idea, my parents did not get us drunk to sit and laugh at us.  It involved a sip or two to see our reaction to such a different taste.  No children were harmed in the taking of this picture.  Enjoying the little things in life is really the best take-away my parents could give me.  I still can be happy with the small stuff in life.  It's all the small stuff that makes a big impression.